When and how to replace brake discs and brake pads
Content
1. Why to change the brake discs and brake pads

4. Typical symptoms of worn brakes
5. Changing brake discs and brake pads – what to look out for
Powerful brakes are among the most important systems in modern vehicles. During every journey, they perform hard work by always bringing the car to a safe stop. However, the constant braking of the heavy vehicle does not leave the components of the brake system unscathed. Find out now why brake discs and brake pads wear out and get valuable tips on how to change the parts.
Why to change the brake discs and brake pads
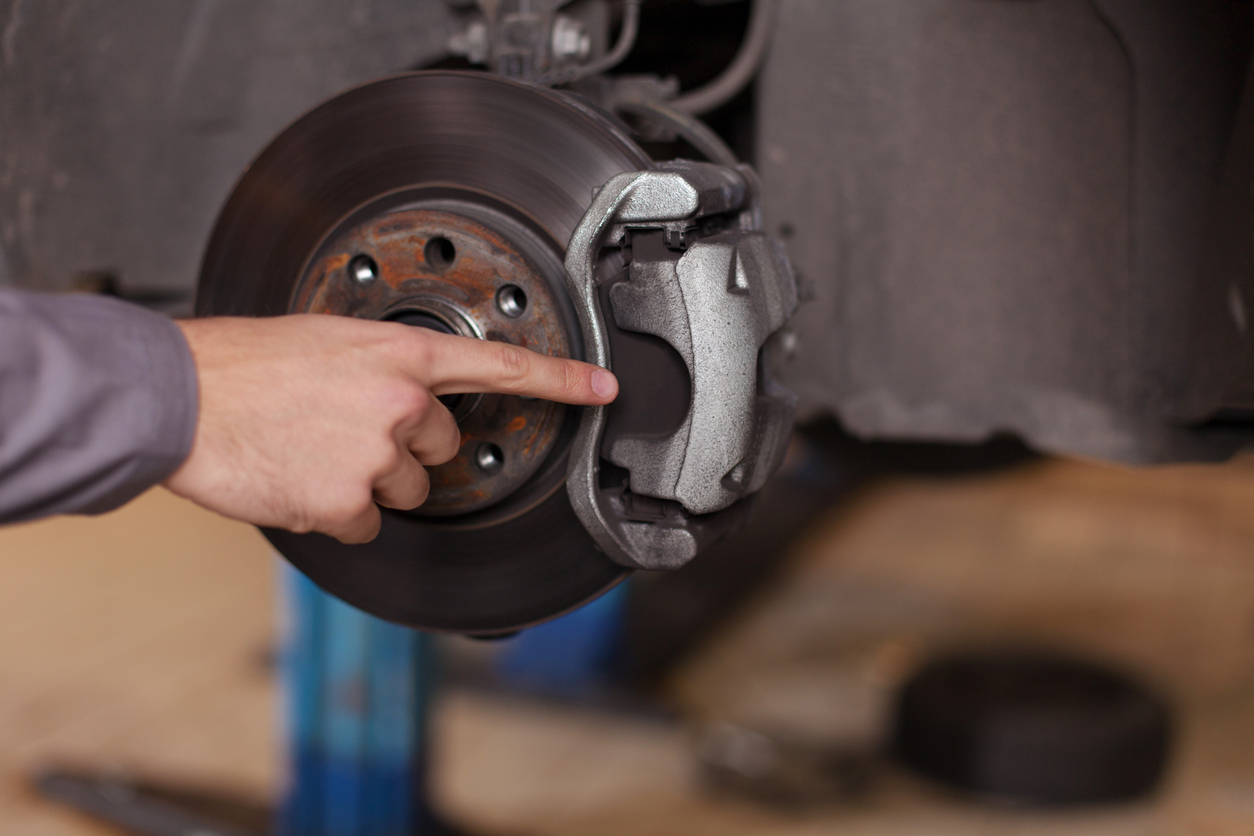
The brake system of modern cars consists of numerous components that are stressed during every braking process. While components such as the brake booster and the brake circuit lines rarely require repair, other parts are subject to high wear.
Classic wear parts are mainly components such as brake pads and brake discs of disc brakes. These are pressed against each other during every braking process and rub against each other. With drum brakes, the same applies to components such as the brake shoes and the brake drum.
Causes of brake wear
The constant rubbing of brake pads on the brake disc or brake shoes on the drum causes material to be removed. This reduces the performance of the brake over time. When the wear limit is reached, the components must be replaced.
Especially with disc brakes, material of the pads is increasingly worn away, which becomes noticeable in the form of black brake dust on the rims. Frequent braking causes the components to wear more quickly, so that driving style also influences wear.
Typical symptoms of worn brakes
If the brakes are worn, this is often noticeable through certain symptoms. In modern vehicles, the wear of the pads is often noted in the settings of the on-board computer. A corresponding indicator light can also point to brake wear. Then it is high time to have the brake pads changed in a workshop.
- Warning light comes on
- Message in the on-board computer
- Braking power decreases
- Brakes rub
- Vibration of the steering wheel
- Squealing during braking
If the brakes have reached or exceeded the wear limit, this sometimes leads to a noticeable decrease in braking performance. Some brake manufacturers also install an acoustic wear indicator, which produces noises like a squeal when the brakes are worn.
If the components are heavily worn, the brakes will sometimes rub and at the same time the braking power will decrease. The steering wheel may also vibrate strongly during braking. With regular maintenance in a workshop, however, the wear of the brake becomes noticeable much earlier.
Changing brake discs and brake pads – what to look out for
When changing brakes, there are a few points to bear in mind. For example, brake components should always be changed axle by axle so that the brakes pull evenly. In addition, wear usually occurs on the same number of axles, whereby the brakes on the front axle tend to wear out more.
You need these tools and parts to change the brakes
- Jacks and stands: They help with jacking up and provide secure footing.
- Wheel nut spanner: The wheel nuts are loosened and tightened with this tool.
- New brake discs: Matching new brake discs ensure good braking performance.
- Suitable brake pads: When replacing them, new pads should always be used.
- Wire brush: Parts of the brakes and the wheel hubs can be cleaned with a wire brush.
- Torque spanner: Wheel nuts and brake parts are tightened to torque.
- Brake piston retractor: This tool can be used to push the pistons back.
- Brake cleaner: The cleaner removes grease and oil from the brake discs.
- Brake paste: The paste facilitates assembly and prevents squeaking later on.
- Ratchet box: All brake screws can be loosened with a ratchet and sockets.
Changing brakes – this is how the repair succeeds
The car’s brakes make a significant contribution to driving safety. If the brakes are not working properly, dangerous situations can quickly arise. Therefore, only expert car mechanics should change brake discs and brake pads themselves. All others are better off leaving the changing of the brakes to a professional in the workshop.
The exact procedure for changing disc brakes can vary depending on the vehicle manufacturer and model. Certain work procedures and their sequence also vary to some extent. Valuable information on changing brakes on certain types of vehicles can often be found in corresponding repair manuals.
1. obtain suitable spare parts
Before changing the brakes, the right parts should be ready for replacement. Car parts such as brake pads and brake discs must always fit the vehicle exactly. When buying parts, make sure they are of good quality and fit exactly.
2. jack up the car
Since free access to the wheel suspension and brakes is required to change the discs and pads, the car must be jacked up. To do this, the car is lifted with a jack and placed on jack stands. A lifting platform is even better.
3. remove wheels
In order to be able to carry out the work on the brake, the wheels of the car must be removed from the respective axle. To do this, loosen the wheel nuts and remove the wheel. This gives good access to the brake system.
4. dismantle the brake calliper
The next step is to dismantle the brake caliper of the respective brake. Depending on the vehicle, several screws may have to be loosened. The brake pads can then be removed from the brake calliper. The brake caliper itself is hung to the side with a wire.
5. remove the brake disc
After removing the brake caliper, there is free access to the brake disc, which is removed next. Depending on the vehicle model, one or more screws must be loosened. Then the brake disc can be easily removed.
6. control and cleaning
After brake calipers, brake pads and brake discs have been dismantled, all brake components should be visually inspected for safety. Afterwards, brake components and the wheel hub can be cleaned.
7. install new brake discs
The newly purchased brake discs can be placed on the cleaned wheel hubs without much effort. Then the screws fixing the brake disc must be screwed back in. If the brake disc is oily, the use of brake cleaner will help.
8. reset brake piston
To be able to change the brake pads as well, the brake pistons of the brake system must be pushed back. To do this, open the brake fluid reservoir and remove some if the brake fluid level is too high. A special tool is used to reset the brake pads.
9. install new brake pads
The next step is to insert new brake pads into the brake calliper. When changing the brake pads, never mix them up or install them the wrong way round. Brake paste for brake pads can help to prevent squeaking later on.
10. mount the brake caliper
After fitting new brake pads in the brake calliper, it is reassembled in its place. Reassembly is done in reverse order. On some models, it may be necessary to reconnect the plug-in connection for brake pad wear.
11. refit wheels
Once the brake calipers and brake discs are in place, the wheels can be mounted. Before this, all components of the brake system should be visually checked again. If there is dirt on the brake discs, it can be removed with brake cleaner.
12. depress the brake pedal
In order for the brake pads to reattach to the brake discs, it is essential to depress the brake pedal several times after changing the brakes. Then check the brake fluid level and top up if necessary.
13. test drive
After changing the brake pads and brake discs, check that the brakes are functioning correctly. Those who cannot check the brake system on a brake test stand should test the brakes briefly by performing a few cautious brake tests. Only then should a test drive be carried out.
Top guides
- Injection system in the car explained simply - parts and function of the injection...
- Maintenance and repair of electric cars: what can your normal garage do?
- Increasing performance with chip tuning: benefits, risks and tips
- Guide: Computer systems and software in your car
- Which electric car parts need repair or replacement most often?
- What is a solid-state battery for electric cars?
- All about engine sensors: from combustion engines to electric cars
- Increase the range of an electric car: How every electric car gets further
- Electric car battery life: How to extend the life of the battery
- What is the compression of a car engine?
- This is the cubic capacity of a car engine
- Internal combustion engine valves: function, defects and repair
- Core components of the internal combustion engine - parts and functions
- Engine lubrication in cars: components, function and defects
- The environmental impact of manufacturing new car parts
- All about pollutant classes and their role in environmental protection
- Engine overhaul: What is an engine overhaul and how much does it cost?
- OEM car parts manufacturing: the key components of the sector
- Understanding engine power - insight into the technology of the car engine
- The steering system of the car - structure and operation
- The car's braking system - structure, parts and function
- Engine types in the car: V-engine, in-line engine and boxer engine explained
- 8 tips before buying a used electric car
- Distinguish OEM parts, aftermarket and counterfeit car parts
- The EPC indicator light is on or flashing: What to do?
- Master brake cylinder: function, defect detection and repair
- OEM car parts for hybrid and electric cars
- Used youngtimer and classic car parts - the best tips
- Cruise control: Function and repair of the cruise control system in the car
- Exhaust system: Everything you need to know about parts and function of the exhaus...
- Locking system: security and reliable locking on the car
- The engine's air intake system - parts, function and replacement
- Brake caliper defective? How to replace it yourself
- Fuel system: parts of the fuel supply from the tank to the cylinder
- Air conditioning system: function and components of your car air conditioning syst...
- The clutch: structure and function explained simply
- Detecting and replacing a defective fuel pump
- Surprised? So many pumps work in your car
- The most common causes of a defective electric car
- The 6 most important safety components of your car
- Identify and repair a defective starter in a flash
- 5 common chassis problems and how to fix them
- 10 unknown car parts that many drivers do not know about
- Engine cooling: function and important components of the cooling system
- Differences between petrol and diesel engines
- All-wheel drive: How the mechanics and components of all-wheel drive work
- Engine control unit car: Everything about components and functioning
- Defective engine control unit: causes, symptoms and repair
- HP vs. torque: What is the difference between power and torque?
- EV motors basics: How are they built, how they work and differ from combustion eng...
- The chassis: overview and function of all suspension components
- Used electric car parts: What to look out for
- The importance of the chassis number when buying used car parts
- ABS pump defective? Function, repair and replacement
- Injection nozzle defective? Diagnosis, cleaning and changing the injection nozzles
- Alternator defective? What symptoms occur and when to change the component
- Water pump defective? Symptoms and how to repair or change it
- Steering gear defective? What are the symptoms and when should the component be re...
- Lambda sensor defective? What are the symptoms and can I clean the sensor?
- Defective air conditioning compressor - what are the symptoms and when should the ...
- Intake manifold defective? Replace gasket or clean manifold?
- Exhaust manifold leaking? Symptoms of a defective exhaust manifold or gasket and w...
- Turbocharger defective? Repair or change?
- Servo pump defective? What symptoms occur and when you should change the part
- Clutch broken? - These symptoms indicate a defect in the clutch
- Common problems and repair of defective drive shafts
- Causes of engine noise and what to do about it?
- What can car diagnostic devices do and do I need an OBD scanner?
- When and how to replace brake discs and brake pads
- Brake warning lamp lights up - causes and what to do?
- EGR valve defective: Avoid engine problems and clean EGR valve
- Improve fuel consumption: How your car uses less fuel
- Squeaking brakes: Why brakes squeak and how to get rid of it
- Safely jacking up a car: How to jack up a car using a jack and jack stands
- How a defect in the muffler becomes noticeable and how it is replaced
- E-car motor: These electric car parts you can replace yourself
- Engine overheated: What you should do if the engine overheats
- Engine check lamp lights up: What you should do as a motorist
- The engine code: What does the code mean and where can I find it on the car?
- Tools for car repair: These 10 tools you should own
- Car repair mistakes: These are the 7 most common car repair mistakes
- The gearbox code: What does the code mean and where can it be found on the gearbox...
- Used parts: How to check the quality of used car parts
- Vehicle transmission: What is the difference between manual and automatic transmis...
- Mileage: This is how mileage affects used spare parts
- Car recycling: What happens to the car when it is recycled?
- OEM original parts or aftermarket: these are the differences
- Advantages and disadvantages of new and used car parts
- Starting problems? Top 9 reasons why your car does not start
- What’s that smell from my car? Top causes and cures
- Advantages of shopping scrap car parts online vs. going to the local breaker yards...
- 10 most frequently purchased car parts from car breakers/junkyard
- Important car parts and their function
- Common car engine problems: Diagnosing, Troubleshooting and Fixes
- Best tips for setting up your own home car workshop
- 7 Car parts replacements and repair tasks you should not do yourself
- DIY Car Maintenance and Repair Tasks
- Guide: How to Maintain and Protect Your Car Engine
- Best practices for Engine Rebuild
- Common Causes of Rear Differential Noise, troubleshooting, and how fix it
- Common Causes of power steering noise and how fix it
- Your Guide to Car Engine Components and Functions
- Licence plate and VIN information
- Top 10 of the most popular brands in second-hand autoparts
- France is just so cool